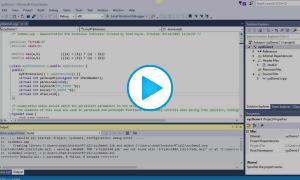
This video demonstrates in detail how to setup an RTX project in Visual Studio. A step by step process makes it quick and easy to get started with RTX development. In this video, Visual Studio Community 2015 is used. RTX development SDK includes libraries for building RTX DLL using Visual Studio 2017, 2015, 2013 and 2010. The resulting project from this video will be used in the subsequent setup video as a template to facilitate quick and easy setup new projects without the burden of repeating all the project setup steps.
Download xyzDemo1.cpp source file (zipped)
Some details and paths involved in project setup follow. NOTE: If you use VS 2017 see additional notes below specific to Visual Studio Community 2017)
Files to add to project after creation.
C:\Program Files (x86)\InvestRT\sdk\c++\include\irtsdk.hC:\Users\yourUserName\InvestorRT\rtx\xyzDemo1\xyzDemo1.cpp
Project Property Changes
General
- Output Directory:
C:\Users\yourUserName\InvestorRT\dll\ - Target Name: xyzDemo1
Debugging
- Command:
C:\Program Files (x86)\InvestRT\InvestRT.exe - Working Directory:
C:\Program Files (x86)\InvestRT\ - Attach: Yes
C/C++
- Additional Include Directories:
C:\Program Files (x86)\InvestRT\sdk\c++\include
Linker
- Output File:
C:\Users\yourUserName\InvestorRT\dll\xyzDemo1.dll - Input: Additional Dependencies:
C:\Program Files (x86)\InvestRT\sdk\c++\lib\irtsdkv140d.lib
The following versions of Visual Studio use the following libs (use the *d.lib version for debugging)...
- irtsdk.lib / irtsdkd.lib - VS 2010
- irtsdkV120.lib / irtsdkV120d.lib - VS 2013
- irtsdkV140.lib / irtsdkV140d.lib - VS 2015
- irtsdkV141.lib / irtsdkV141d.lib -VS 2017
Additional Notes for those using Visual Studio Community 2017
- When creating new project, choose Visual C++ > General > Empty Project. Then in Properties > General, set Configuration Type to Dynamic Libarary (.dll) and set Target Extension to .dll
- In Properties > Linker > Input, use irtsdkV141d.lib for Additional Dependencies.


